IAM Role for Cloud9
1. IAM Role for your Cloud9 IDE
- Follow this deep link to create an IAM role with Administrator access.
- Confirm that AWS service and EC2 are selected, then click Next to view permissions.
- Confirm that AdministratorAccess is checked, then click Next: Tags to assign tags.
- Take the defaults, and click Next: Review to review.
- Enter
admin-rolefor the Name, and click Create role.
2. Attach the IAM Role to Cloud9
- Follow this deep link to find your Cloud9 EC2 instance
- Select the instance, then choose Actions / Instance Settings / Attach/Replace IAM Role
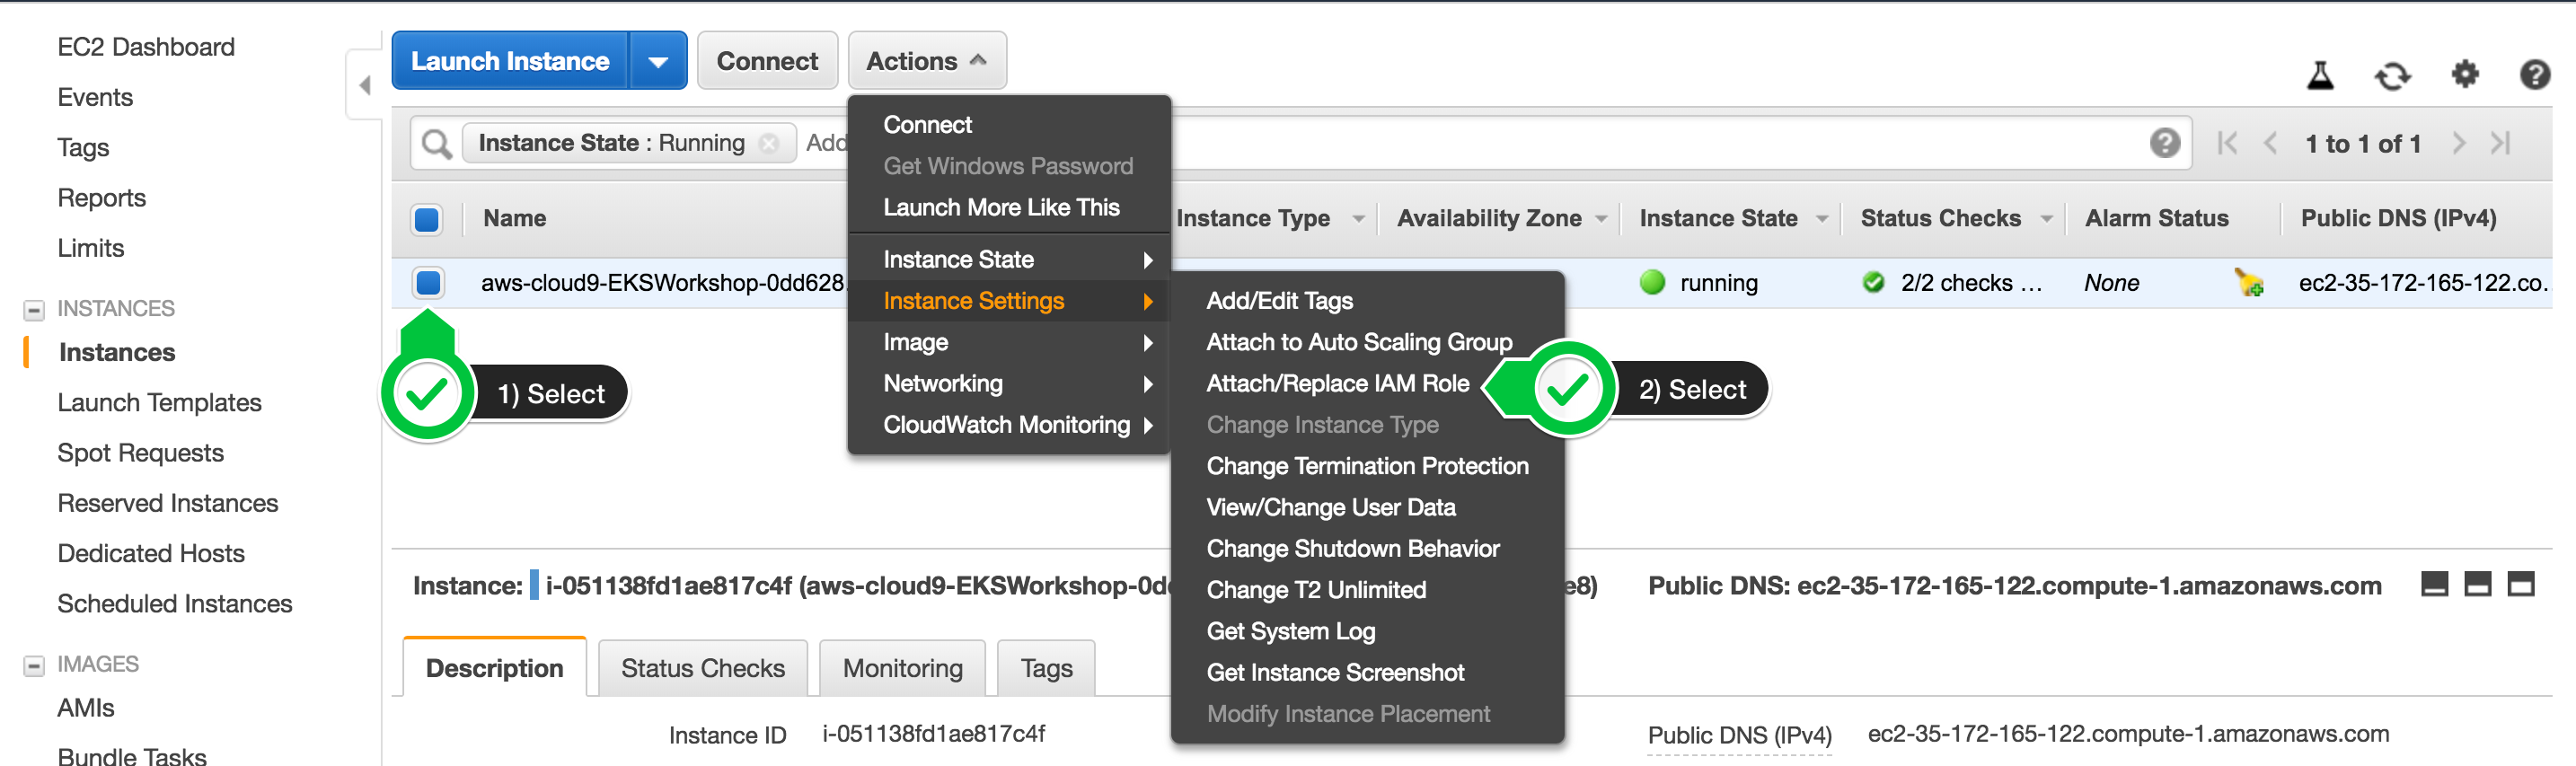
- Choose
admin-rolefrom the IAM Role drop down, and select Apply
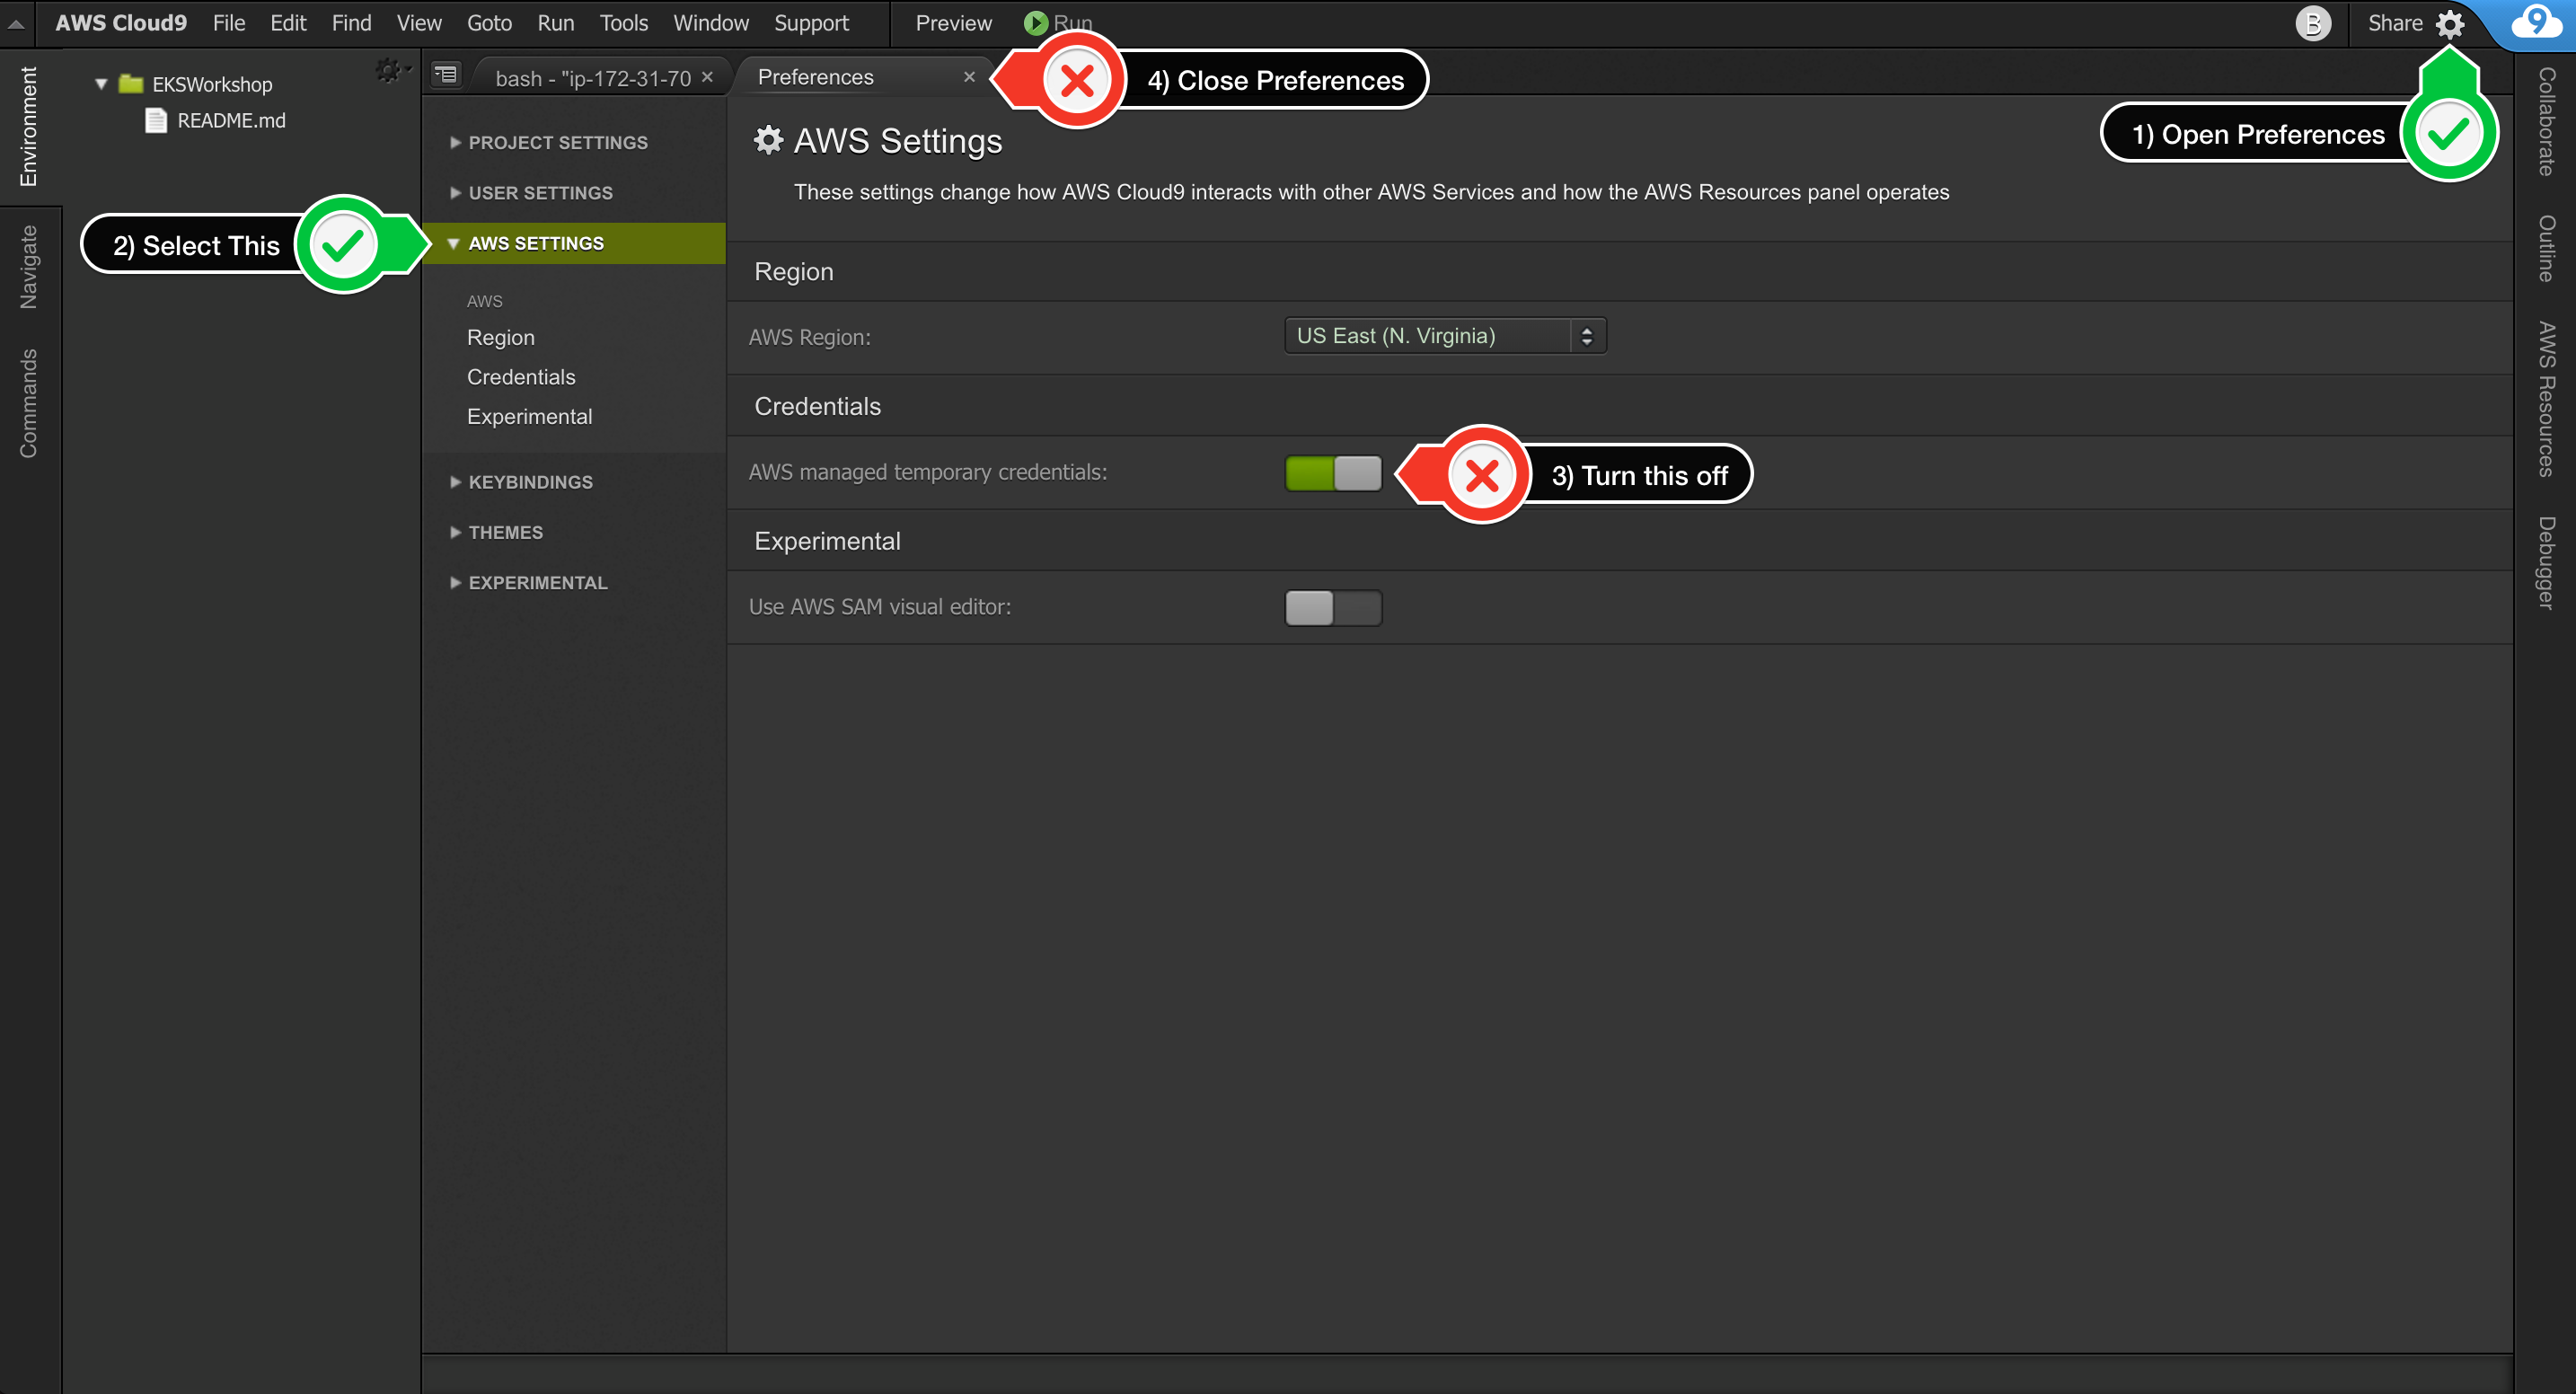
3. Update IAM settings for Cloud9
Cloud9 normally manages IAM credentials dynamically. This isn’t currently compatible with the EKS IAM authentication, so we will disable it and rely on the IAM role instead.
- Return to your workspace and click the gear icon (in top right corner), or click to open a new tab and choose “Open Preferences”
- Select AWS SETTINGS
- Turn off AWS managed temporary credentials
- Close the Preferences tab
To ensure temporary credentials aren’t already in place we will also remove any existing credentials file:
rm -vf ${HOME}/.aws/credentials